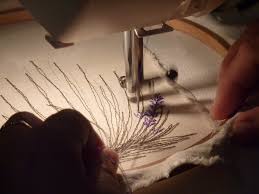
Design Considerations, Stabilizer Choices, and Hooping Techniques
With the right hooping and stabilizing techniques and the right design choice for a particular fabric, even a novice can achieve professional embroidery results.
Although machine embroidery appears fairly straightforward – the machine does most of the work – it is important to realize that proper hooping and stabilizing, and proper design choice are necessary to achieve professional-looking results on any fabric.
Choosing the Right Design for the Fabric and Project
Many embroiderers forget that some designs work better than others on certain types of fabric. This can be particularly troublesome when doing custom embroidery for a client who has a specific idea in mind. Still, choosing an appropriate design for the fabric and application can make a huge difference in the quality of the finished project.
As a general rule, lighter-weight fabrics and fabrics that need to drape require lighter, more open designs to avoid drooping and puckering. Fabrics with a high nap, like thick towels, require more dense designs so that the stitches don’t get lost in the fabric. Sturdier fabrics and projects that don’t require the fabric to drape offer more flexibility about design choice.
Uses for Different Types of Stabilizer
The many varieties of stabilizer can be intimidating at first, but each has a purpose. Weaker fabrics require a sturdier stabilizer.
- The lightweight water soluble stabilizer is used as a “topper” on fleece, terry, and other high-nap fabrics. The water-soluble topper helps the stitches sit easily on top of the nap and keeps individual threads and loops from poking through the embroidery.
- The heavyweight water soluble stabilizer is used for freestanding lace, translucent fabrics (like organza), and projects where the back of the embroidery will also be visible. In these cases, it is essential that no stabilizer show at all.
- Tearaway stabilizer is available in light, medium, and heavyweights. Tearaway also comes in wet and stick and peel and stick varieties. Woven fabrics with a light, open designs work well with tearaway stabilizer. Sticky stabilizers are good for very thick fabrics that are hard to hoop. When using a sticky stabilizer, it is important to clean the needle with alcohol if it starts to get sticky while sewing.
- Cutaway stabilizer comes in light, medium, and heavy weights as well as fusible (iron-on) varieties. Cutaway stabilizers are good for knit fabrics like stretchy t-shirts, thin fabrics or fabrics with a loose weave, and for more dense designs on woven fabrics. Cutaway stabilizer is very sturdy and helps the design keep its shape even through repeated washing and use.
Proper Hooping Technique
Hooping the fabric properly may be one of the hardest skills for new embroiderers to master. Many embroiderers like to hoop sticky stabilizer and then adhere the fabric to the stabilizer without actually hooping the fabric. This is a shortcut and in some cases (very thick fabrics that can’t be hooped) it is necessary, but for the best results, fabric and stabilizer should be hooped together.
Even on low-end home embroidery machines, the needle may puncture the fabric ten times per second or more. This causes tremendous strain on the fabric and may lead to the fabric shifting or stretching during embroidery. When the stabilizer and fabric are hooped together, stretching and shifting are minimized and all stitches land where they are supposed to.
Ironically, thicker fabrics like bath towels and sweatshirts are the most difficult to hoop, but these same fabrics need to be hooped the most. When using a sticky stabilizer on very thick fabric, the bottom of the fabric will be held in place by the stabilizer, but the top of the fabric may still shift causing parts of the design not to line up properly.
For the best results on most fabrics, use a sticky stabilizer, a fusible stabilizer, or spray the stabilizer with temporary adhesive and attach to the fabric. Open the top hoop wide enough to accommodate the fabric and stabilizer together. Place the bottom hoop on a non-slip surface (rubber shelf liner is inexpensive and works well for this purpose). Place the fabric/stabilizer combo on top of the bottom hoop. Place the top hoop on top and slide the fabric as necessary to align the horizontal and vertical axes with the hoop. Firmly press the top hoop into place without stretching the fabric. Tighten the top hoop as much as possible. The fabric should be taut and sound like a drum when thumped. Never try to stretch or shift the fabric after it is hooped. If there are loose spots, remove the top hoop and start over.
For slippery fabrics like nylon, place small strips of rubber shelf liner or double-sided tape around the sides (not the corners) of the bottom hoop before hooping the fabric. This will keep the fabric from slipping during embroidery.
Choosing the Right Needle for the Fabric
Using the right needle is almost as important as using the right stabilizer. For most fabrics, a medium-sized (75/11 or 90/14) embroidery, universal, or sharp needle will work well. More delicate fabrics require a smaller needle. For stretchy fabrics, always use a ball-point needle to avoid runs in the fabric around the design. For specialty applications like leather and denim, use a special needle that is designed for that purpose. There are also special needles for thicker threads and metallic threads that will minimize thread breakage and shredding.
Embroidery is a wonderful way to personalize just about anything and can be a most rewarding hobby. Mastering techniques like proper hooping and stabilizing, knowing the characteristics of the specific fabric and making wise choices about designs, stabilizer, and needles can make the difference between a headache, heartbreak, and overwhelming pride.

