With a skein of floss, a needle, cotton fabric and a hoop you can learn a craft that sews easy!
Remember the hand embroidered tablecloths, napkins and pillow cases? They don’t have to be a thing of the past. Embroidery is not difficult to learn.
One stitch at a time. This is your new mantra. One stitch at a time. Just like anything, if you look at all there is to learn it can seem too big and overwhelming. How does that saying go? How do you eat an elephant? One bite at a time. Embroidery isn’t difficult. You just need to focus on learning one stitch at a time.
Materials Needed
- Embroidery floss (1 skein)
needle - 12″x12″ piece of cotton fabric
- embroidery hoop (8″ or smaller)
- pencil
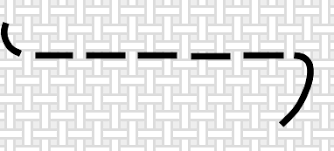
Running Stitch
It is called this because it is almost like making train tracks that can travel all over. I like to use this when embroidering lettering, especially cursive writing. (That project is coming up. Watch for the Philosophy quilt.)
The key to good embroidery is making the stitches as close to uniform as possible.
Decide on the design for your embroidery. For the running stitch, you may want to think about writing a name or part of a verse in cursive. Don’t make your first attempt too daunting.
Using a pencil, draw your design on the fabric exactly as you would like it to be.
For those of you that have not used an embroidery hoop, it is two pieces that come apart. Unscrew the end and an inner ring should drop out. Lay your fabric even across the inner circle. Place the outer circle on top of the fabric. Place the inner circle into the outer circle still leaving the fabric sandwiched between.
Once in place, begin tightening the screw back up. As you tighten the screw, pull the material gently, turning it to keep it evenly disbursed across the hoops. When the material is taut in all directions, and the screw is tight, you are ready to embroider. Don’t worry if all of your design is not in the center of the hoop. You can do a section at a time and then loosen up the screws and move the fabric to the next section.
Section a piece of embroidery floss approx. 3 feet long. Each skein is six string thicknesses. For different parts of projects, you can use more strings within the needle at one time to make something stand out. On the same hand, you can use one or two strands to soften the look. For this project, we are going to use two strands.
Here’s a tip. Separate the two strands at one end, so you have two strands in one hand and four in the other. Pull them apart slightly. You can use another person, your foot, your mouth or anything else you can finagle. As I pull the strands apart, the other end is going to tighten up. Here’s what you do. Have the other person tug gently on the end that is not divided. It helps to spread the strands and divide without knots.
Thread the needle, pulling the thread through. Do not knot the ends together. Knot one end only. This will allow you to adjust your thread length. You can add more whenever you need it by simply moving the needle up the thread. You do need to make sure the second unknotted end is not caught up in a stitch. The easiest way to do that is always to make sure that end is shorter.
For example, let’s say your first letter is a capital “F.” Starting at the bottom of the letter, poke the needle through from the back to front to hit the spot where your pencil first began writing. **Moving over next to the hole the thread is coming out, insert the needle from front to back. Never pull it all the way through yet. Pull it through enough to leave about a 1-inch loop on the top of the fabric.
Now with the needle in the back, go forward along the letter about 1/8th of an inch. As you pull the needle up, insert it from beneath through the loop. Now pull taut, not tight. Repeat from **. To end off, knot from below and cut. Knot and begin in the next spot. There are many more stitches that all add a different texture to the design. Practice, practice, practice, and watch in August for an embroidery project or two. You never know-I could throw a real twist at you.

